Life Lately and The Best Ice Cream I've Ever Eaten

I know its been literally years since my last post, but I've been still baking and making up a storm despite not blogging about it. Not sure about you, but between the baking, picture taking, blogging and consuming all of these wonderful calories it can get pretty intense. So I've decided that while I'm not going to commit to blogging regularly, I will commit to making any of my posts much more minimal effort on my part and also on yours. Only recipes that I'd make again, less commentary to read (just get to the good stuff) and likely nothing fancier than iPhone photos.

So what recipe has dragged me out of my blogging slumber do you ask? This... It also helps that I bought my husband the ice cream maker attachment for our lovely Kitchenaid mixer

It sounds like this recipe may be an adapted version by Saveur using a Jeni's Splendid ice cream base. Aside from the painful wait of letting this set up in the freezer, the recipe wasn't too complicated and it was relatively easy to follow. I also liked that it didn't have raw eggs in it, which just weirds me out.

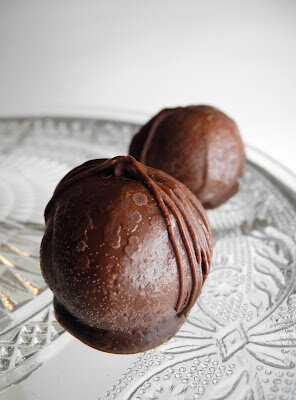
BLACKSTRAP MOLASSES + PECAN PRALINE ICE CREAM!!!!! YASSS!!!
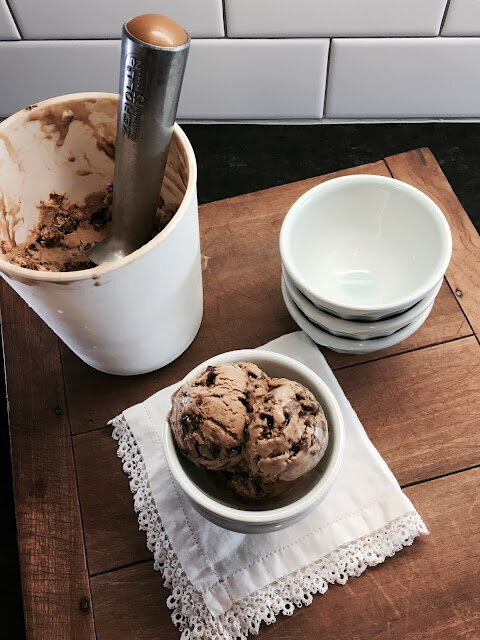
Molasses and Pecan Praline Ice Cream
BLACKSTRAP PRALINE ICE CREAM
Recipe found on Saveur. Makes about one quart.

For the Ice Cream
2 cups milk
4 tsp. cornstarch
14 cups heavy cream
23 cup sugar
2 tbsp. blackstrap molasses
14 tsp. kosher salt
3 tbsp. cream cheese, softened
For the Praline
1 cup pecans (I chopped first then measured)
2 tbsp. light brown sugar
2 tbsp. blackstrap molasses
1 tbsp. unsalted butter, melted
14 tsp. ground cinnamon
14 tsp. kosher salt
Instructions
Make the ice cream: In a bowl, stir together 14 cup milk and the cornstarch; set aside. In a 4-qt. saucepan, whisk together remaining milk and the cream, sugar, molasses, and salt; bring to a boil over medium-high heat. Cook for 4 minutes; stir in cornstarch/milk mix. Return to a boil and cook, stirring, until thickened, about 2 minutes.
Place cream cheese in a bowl and pour in 14 cup hot milk mixture; whisk until smooth. Then whisk in remaining milk mixture. Pour mixture into a plastic bag; seal, and submerge in a bowl of ice water until chilled. Pour mixture into an ice cream maker; process according to manufacturer's instructions.
Make the praline: Combine pecans, brown sugar, molasses, butter, cinnamon, and salt on a lined baking sheet (I used a silpat knock off from Amazon that worked great) and bake until bubbly and dark, about 12 minutes. Cool, roughly chop, and fold into churned ice cream.
Transfer ice cream to a storage container (I love these Tovolo containers) and freeze until set. I waited two hours and it wasn't set up enough, but it was great after leaving it overnight. 4 hours may be enough as well if you can't stand to wait.

About the Velveteen Baker

"It doesn't happen all at once," said the Skin Horse. "You become. It takes a long time. That's why it doesn't happen often to people who break easily, or have sharp edges, or who have to be carefully kept. Generally, by the time you are Real, most of your hair has been loved off, and your eyes drop out and you get loose in your joints and very shabby. But these things don't matter at all, because once you are Real you can't be ugly, except to people who don't understand." - Margery Williams, from The Velveteen Rabbit

I've always loved baking, but never considered myself a real baker. I used to bake a lot with my mother growing up, but that fell out of fashion for me somewhere in between boys and high school. It wasn't until I moved to Atlanta for work, where didn't know a soul, that I returned to my long lost love for baking. 

That was just shy of three years ago. Since then I've been baking all sorts of pies, cakes and cupcakes, but always revert to my muse...red velvet. I don't know where my obsession began, but I vaguely recall trying red velvet years ago at a wedding. I've evolved my red velvet recipe over the past few years, changing each measurement and ingredient ever so slightly in hopes of creating the perfect red velvet that I once remember.

Every time I pass by a bakery or restaurant that makes red velvet I absolutely have to order it. Then I assess it across multiple variables of what I consider to be the optimal color, texture, flavor...and icing (everyone's favorite). Then I compare it against my own creation. While I do think my current recipe is pretty spot on, I don't feel I've perfected red velvet, nor do I think anyone else has either (or so that I've tasted).

Hence the reason for this blog. I figure that if I dig back to the roots of red velvet (which by the way seem completely inconclusive); bake enough and test enough (ie feed my co-workers); that one day I will be able to truly master red velvet.

And at that point I still probably won't be a real baker, but I'll be damned if I can't make a killer red velvet cake. Feel free to join me in my quest. I'll be baking, blogging and doing all of the painstaking research in between.

Tried and True Tres Leches Cake

What do I love more than milk? Three kinds of milk!! Ever since my friend Sunni introduced me to tres leches, I have been hooked! I was a little nervous making this since Sunni only made things that were ridiculously complicated and had a chance of exploding, but I figured it was worth the risk.

While I can't say if this is as good as hers (unfortunately it has been far too long for me to recall), it was pretty fabulous and I will most definitely be making it again. We had a progressive dinner this past weekend with several of our new neighbors and I volunteered to do the dessert course. As my neighbor Kevin would say, this cake was "stupid good". So good that I could only snag a lonely corner piece to take pictures of. Next time I hope to plan a little better and take some shots of it before its completely devoured.

I always get nervous when trying out a new recipe, but this one from Cook's Country did not disappoint. My husband did suggest adding a little dulce de leche / salted caramel drizzle to it next time, but it was fabulous just on its own. So good that I'm even considering throwing tradition out the window and making it for Thanksgiving this year. And I'm not even kidding.

***UPDATE: Since this initial post, this recipe has become a staple in our household. It is so good that I haven't even bothered looking for another recipe. I hope you enjoy!

Mmmmm, tres leches.

Tres leches. Good for just about any time of day. Nom nom nom.

Tres Leches Cake from Cook's Country

Milk Mixture


  • 1 (14-ounce) can sweetened condensed milk
  • 1 (12-ounce) can evaporated milk
  • 1 cup heavy cream
  • 1 teaspoon vanilla extract  
Cake
  • 2 cups all-purpose flour
  • 2 teaspoons baking powder
  • 1 teaspoon salt
  • 1/2 teaspoon ground cinnamon
  • 8 tablespoons (1 stick) unsalted butter
  • 1 cup whole milk
  • 4 large eggs, room temperature
  • 2 cups sugar
  • 2 teaspoons vanilla extract
 Whipped Topping
  • 1 cup heavy cream
  • 3 tablespoons corn syrup
  • 1 teaspoon vanilla extract

  1. For the milk mixture: Pour condensed milk into large microwave-safe bowl and cover tightly with plastic wrap. Microwave on low power, stirring and replacing plastic every 3 to 5 minutes, until slightly darkened and thickened, 9 to 15 minutes. Remove from microwave and slowly whisk in evaporated milk, cream, and vanilla. Let cool to room temperature.
  2. For the cake: Adjust oven rack to middle position and heat oven to 325 degrees. Grease and flour 13 by 9-inch baking pan. Whisk flour, baking powder, salt, and cinnamon in bowl. Heat butter and milk in small saucepan over low heat until butter is melted; set aside off heat.
  3. With electric mixer on medium speed, beat eggs in large bowl for about 30 seconds, then slowly add sugar until incorporated. Increase speed to medium-high and beat until egg mixture is very thick and glossy, 5 to 7 minutes. Reduce speed to low and slowly mix in melted butter mixture and vanilla. Add flour mixture in three additions, scraping down bowl as necessary, then mix on medium speed until fully incorporated, about 30 seconds. Using rubber spatula, scrape batter into prepared pan and bake until toothpick inserted into center comes out clean, 30 to 35 minutes (it took me the full 35). Transfer cake to wire rack and let cool 10 minutes.
  4. Using skewer, poke holes at 1/2-inch intervals in top of cake. Slowly pour milk mixture over cake until completely absorbed. Let sit at room temperature 15 minutes, then refrigerate uncovered 3 hours or up to 24 hours 
  5. For the frosting: Remove cake from refrigerator 30 minutes before serving. With electric mixer on medium speed, beat heavy cream, corn syrup, and vanilla to soft peaks, 1 to 2 minutes. Frost cake and slice into 3-inch squares. Sprinkle with just a tad of cinnamon and serve. (The assembled cake can be refrigerated for up to 3 days.)

We've gone bananas!

Banana nut cupcakes with cream cheese frosting
I know, I know. Its been eons since my last post! All I can say is that I've been busy with life. I've changed jobs, ran my first half marathon, and also built a house!

Right next to planning our wedding, I think that building a house was probably one of the most stressful things I've ever done. But it has been completely worth it though. We really do have our dream kitchen and I have been baking up a storm ever since we moved in.

Our new kitchen!
A few weekends ago our sweet little niece Ava came over and we made banana cupcakes. I had only tried to make banana cake once before and it turned out awful. Little did I know how ripe your bananas need to be to make a good banana cake. Like they need to be on the edge of disgusting. Gabe offered to toss them out at least three times before they were ready.

I used this recipe but made cupcakes instead of a sheet cake - and the batter makes a LOT of cupcakes, about 28 or so. I just added some walnuts to the batter and whipped up a batch of my go-to cream cheese frosting, but added the zest of one lemon for a little extra zing. It baked a ton faster for me than what the recipe said. I baked them at 275° and they were done after about 30 minutes in my convection oven.

My niece Ava, such a huge helper in the kitchen!

Banana Cake w/ Walnuts (original recipe is here)
1 1/2 cups bananas, mashed, really ripe
2 teaspoons lemon juice
3 cups flour
1 1/2 teaspoons baking soda
1/4 teaspoon salt
3/4 cup butter, softened
2 1/8 cups sugar
3 large eggs
2 teaspoons vanilla
1 1/2 cups buttermilk
1/4 cup walnuts

Preheat oven to 275°. In a small bowl, mix mashed banana with the lemon juice; set aside. In a medium bowl, mix flour, baking soda and salt; set aside. In a large bowl, cream 3/4 cup butter and 2 1/8 cups sugar until light and fluffy. Beat in eggs, one at a time, then stir in 2 tsp vanilla. Beat in the flour mixture alternating with the buttermilk. Stir in banana mixture. Pour batter into lined cupcake pans and bake in a preheated oven until toothpick inserted in center comes out clean.

Cream Cheese Frosting
1lb box of confectioners sugar (a little under 4 1/2 c sifted)
1-8oz block of cream cheese (softened)
1 stick unsalted butter (softened)
1t pure madagascar vanilla
zest from 1 lemon

In a large bowl blend butter, cream cheese, lemon zest and vanilla together. Add in confectioners sugar in batches until completely blended. Frost cupcakes and enjoy! Note: I was short on frosting since this recipe made so many cupcakes, and I like to put quite a bit of frosting on my cupcakes. Next time I make these (and there definitely will be a next time), I will update this with how much is actually needed.

A Cake Fit for a Princess & My First Time with Fondant

I have a new found respect for cake decorators. I mean really. While I've always prided myself with being the artsy type there is a big difference between arts and crafts and creating things that are not only pretty to look at, but intended to be edible as well.

When Ava told me that she wanted a Rapunzel cake for her 5th birthday, I immediately thought about those dress cakes that my mom used to make me as a kid. My mom made it look so easy! I went out and bought Wilton's Wonder Mold and was shocked to discover that they still used the same dolls from the 1970's. Fortunately I was able to find a Barbie Rapunzel doll and figured I could engineer it somehow into the cake and all would be well. That was my first mistake.

At the end of Wilton's suggested baking time for the cake it had the consistency of a Jello mold. Not good. I let it bake for another 30 minutes and finally it was cooked through. My second rookie mistake was that I didn't factor for the cake not being as tall as the pan itself. What did that mean? That meant that Rapunzel's dress was going to hit mid-thigh unless I removed her legs or chopped off her ankles. Not cute. And while I briefly entertained the idea, I was not about to dismember a $20 Barbie doll.

My first Rapunzel cake was such a disaster that I didn't even take a picture. Come to think of it, I should have just so I could submit it to Cake Wrecks. It would've been a great addition to this post. So what now? Only hours remained until Ava's birthday and I had nothing to show for it besides a disaster of a kitchen and a husband that was seriously questioning my sanity. Most people at this point would've just bought some cupcakes and called it a day. But not me.

I decided to stick to what I know...well, somewhat. I was going to a layer cake and somehow make it look like Rapunzel. I drew a picture of Rapunzel and figured I could cut out all of the pieces in fondant, put it together like a puzzle and ta-da! That was my third mistake.

Fortunately for me and sweet little niece Ava, my last mistake was still salvageable and I was able to cover all of my errors with fondant. I didn't take a ton of pictures because, well, I was literally giving Rapunzel eyebrows just minutes before we ran out the door. 

The final product was a two-layer strawberry cake with my standard cream cheese frosting (1lb powdered sugar, 1 stick of softened butter, 1 stick of softened cream cheese, 1t vanilla). Here is the cake recipe I used which I've made twice and its actually quite good. While it was quite the undertaking, it was well worth seeing the smile on Ava's face, especially after she told me that I am "the best cake baker ever."


A Rustic, Owl-inspired Baby Shower with Lots of Sweets

Last weekend I was honored to be able to help host my dear friend Angela's baby shower. It was my first time hosting a baby shower, and it was a lot of fun! Since my wedding I've been mildly obsessed with dessert tables, and thought this would be a great opportunity to test my skills by creating a dessert table that incorporated our rustic, owl-inspired theme.

Since the colors were turquoise and lime green I initially struggled with what I should make for the desserts, but finally decided upon doing a variation of my red velvet cupcakes (with a different colored food dye, of course), mini key lime pies and some s'mores bars. I'd never made key lime pie before but was delighted to discover how easy it was to make. Its definitely something foolproof that you can whip up in just a few minutes (if you use pre-made crust) that also tastes wonderful.

For the decor I bought a bunch of burlap that I used to make a table runner, some fabric bunting and to line a frame that I used as a mock menu (I wrote with liquid chalk on the glass). I also found some wooden slabs at Michael's that I used to display the key lime pies on, and then used some of my miscellaneous cake stands and plates that I used for my wedding. All in all, I think it turned out pretty well although I would recommend some modifications to the recipes (see below). Happy Baking!


The Recipes 

Blue velvet cupcakes: I just used my standard red velvet cupcake recipe, omitted the red food dye (obviously) and used about 25 or so drops of neon blue food dye (it comes in a package with other neon colors). While I was going for a darker aqua color, they turned out a smidgen darker than I anticipated. I guess I'm used to being a little heavy handed with the red food dye, and didn't think that the neon colors would be so concentrated. The other option I thought would be to replace the cocoa powder with white chocolate powder which would result in a different flavor, but a brighter colored cupcake. 

S'mores Bars: You can find the recipe here, but I recommend omitting the cocoa pebbles. They were tasty, but I think they would be considerably better without. It almost gave it a coconut flavor and texture that I wasn't a big fan of. I also thought that mixing Fluff (ie marshmallow cream) or Nutella into the chocolate would be pretty divine as well. 

Mini Key Lime Pies: I used this recipe from Emeril Lagasse and simply put the filling into mini pre-made graham cracker crusts. It was not only one of the easiest things I have ever made, but one of the best key lime pies I've ever had. I purchased key lime juice (not regular lime juice) since I didn't know where to buy key limes, nor did I feel like squeezing a ton of them. I did add a teeny-tiny bit of lime green food coloring to the filling to give it some more pop for pictures. I didn't bother making the topping with sour cream, but I'm sure its quite good as well from all of the positive reviews the recipe has.

Invitations: Tiny Prints
Owl cake toppers: The Paige Spot on etsy

And We're Back!

While it seems I may have taken quite the hiatus from baking and blogging, I have an honest to goodness excuse...I got married! For those of you that have ever planned a wedding, I know you understand where I'm coming from. Everything seems to take way more time than you expected and cost way more than you expected, too. But despite the hours upon hours of planning (with a few sprinkles of freak-outs here and there), I am happy to say that everything turned out wonderfully! While all of the decisions along the way, like which dress to buy, venue to book, etc, were all important to make, the best and most important decision of all was whom I chose to marry. My husband is such an amazing man and I feel so blessed to be able to spend the rest of my life with him.

While I ultimately decided against baking all of the desserts for my dessert table (pictured below), I was able to find a bakery here in Atlanta called the Atlanta Cupcake Factory that met my rather high expectations and made some adorable and tasty cupcakes. I chose four different flavors to go along with our Vintage Southern theme including key lime pie, strawberry lemonade, sweet potato bourbon and of course...red velvet. Then I had them displayed on some vintage pieces I'd collected along the way. They were a hit - so much so that my groom and I weren't even able to try one! Apparently when you have several different flavors, it makes people want to try one of each. I'm wondering if this is why people do a cake cutting ceremony, so they are certain to have a piece of their own cake? The rest of our food was pretty fabulous too. We had mini pulled-pork sliders, green beans wrapped in bacon, BLT stuffed Campari tomatoes (yes more bacon), and other yummy Southern fare, courtesy of our caterer Beyond Details.

We had such an amazing time, and now that the dust has settled a bit, I am going to start dedicating more time to my baking (and blogging). However, since I've had a recent obsession with chocolate salted caramel, I may be infusing some posts of the non-red velvet variety. I hope that is cool with all of you folks! Stay tuned for some holiday inspired posts, and have a Happy Thanksgiving!

If you are remotely interested, you can find some more of our wedding photos by Andrew Thomas Lee here, or you can check out our wedding trailer by Rodinis Films.

Have Your Red Velvet and Drink it Too!

When I first decided to blog about red velvet, many people said I was crazy. "How on earth can you just blog about red velvet?" they asked. "Won't that get a little repetitive, and well, boring?"

Little did they know this lesser known cake that fell out of favor in the 1970's due to the

Red No. 2 food dye scare

, would come back with a vengeance -- making its way into our favorite recipes, and subsequently, into our hearts.

To all of the naysayers, I present to you a red velvet cocktail shot. Yes, the cake we both know and love has now made its way into liquid form, to be consumed and enjoyed in 1oz doses. I think its safe to say that once a drink has been named after something, that it is officially mainstream. I'm not sure if a drink can possibly taste like red velvet, but its worth a shot (pun intended). You can find the recipe here.

To Bake, or Not to Bake (Anthro Giveaway!)

I'm obsessed with this color right now.

As many of you probably know from my earlier posts, I recently got engaged and am in full planning mode. Planning a wedding is no easy task, especially when you are on a tight budget. My fiance and I have been trying to find ways to cut costs, and also to make the wedding reflective of who we are as a couple.

So recently I've been toying with the idea of baking for my own wedding. But not just the obvious red velvet cake. I'm thinking a whole dessert table chock full of red-velvety goodness. Red velvet cupcakes, red velvet cake balls, red velvet double doozies, red velvet trifle, red velvet cheesecake...I think you get the picture.

Here is my thought process: if the base recipe for several of these is the same (cake balls, trifle, cupcakes, etc), would it really be that difficult to make enough of these things to feed 100 people? Mind you, I'd probably need to make all of it 1-2 days prior to my wedding. I'd love to get thoughts from anyone who's attempted something like this before.

**ANTHROPOLOGIE GIVEAWAY**

Now onto the giveaway, my fiance and I have entered

Crate & Barrel's Ultimate Wedding Contest

, and are just 100 or so votes away from advancing to the next round. We could really use your help and support, but of course I want to offer you something in return. I love everything about Anthropologie, and I think that every baker (or cook) should have one of their fabulous little aprons. My fiance actually bought me one for Christmas and had it embroidered with "The Velveteen Baker". I absolutely love it, and even when I'm covered in flour and red food dye, I still feel fabulous in it.

So here is the deal. One lucky winner will get to take their pick of one of these chic

aprons

from Anthropologie. There are three ways to enter, so even if you've already voted for us you still have a chance to win.

How to Enter:

  • Vote for my fiance and I in Crate & Barrel's Ultimate Wedding Contest http://www.ultimateweddingcontest.com/entry/126647(detailed instructions below),  then come back here and comment on this post which number vote you were (ie "Vote #525"). 

  • If you’re on Twitter, receive an extra entry by tweeting the below (tell me you’ve tweeted, by leaving an extra blog comment): "Win an @Anthropologie apron from @velveteenbaker: http://bit.ly/gSK5Gc #giveaway"

  • Get an extra entry if you post about this contest on your blog, or share it with your friends on Facebook asking them to vote for us. Must include this link http://bit.ly/hlTRaL (again, leave an extra blog comment here so I know you posted).

**Entries closed.**

One winner will be randomly selected. Anonymous comments, or those that don't follow the instructions will not be counted. If I am not able to contact the winner, another winner will be selected.

Entries will be accepted until noon on Sunday, April 24th (EST) and the winner will be announced and contacted shortly thereafter. UPDATE: I AM EXTENDING THIS CONTEST UNTIL APRIL 29th! I'm still getting more entries come in and I feel awful not including them. Besides, we still need more votes (can you blame me?). Thanks so much for the support!! Winner will be announced after April 29th.

How to Vote (detailed instructions):

STEP 1: Go to

http://www.

ultimateweddingcontest.com/

entry/126647

STEP 2: Click the pink "VOTE" button

STEP 3: Scroll down and either

Login with Facebook

-OR-

Register

with your email address.

If you login with Facebook (easiest way to vote):

STEP 4: Click "Allow" for Request for Permission. It will take you back to the contest page and a pop-up that says your vote has been counted will appear.

STEP 5: Come back to this post and comment which number you were

back here (ie "Vote #525" - you'll see it on the contest page)

.

If you vote via email:

STEP 4: Provide your first and last name, email address and a password

STEP 5: Check your email for a message from "Ultimate Wedding Contest" and click to confirm your address.

It will take you back to the contest page and a pop-up that says your vote has been counted will appear.

STEP 6:

Come back to this post and comment which number you were

back here (ie "Vote #525" - you'll see it on the contest page)

.

**WINNER ANNOUNCED**

I've picked a winner! The winner was randomly selected using random.org after any incomplete or anonymous entries were removed. And the winner is...comment #34, Krista from

In Krista's Kitchen

. Congratulations Krista! I'll be emailing you with details so you can pick out which fabulous apron you'd like to have!

Adorable!

Love the pleats and cute little bow!

Red Velvet Cookies and a Love Story

DSCN0707Ah, Valentine's Day. Love is in the air and red velvet - or anything red or heart-shaped for that matter - is selling like hotcakes.

I don't know about you, but for the longest time I had mixed feelings about Valentine's Day. Considering my Facebook status had long been "single" (or otherwise "complicated") for the latter part of my 20's, I guess you could say I was a little bit jaded. But February 14th, 2010 completely changed my perspective on the holiday.

People always say that you find love when you stop looking, and I couldn't agree more. I used to think that phrase meant you had to completely give up first, or just not appear to be looking, but neither of these are true. Without going all Tony Robbins on you, it finally dawned on me that I had to stop looking outwards, and instead look inwards and try to be the right person for someone else. I made lots of lifestyle changes and lots of decisions. None of it was easy, but had I not gone through that process I'd probably still be bitter, party of one.

Now fast forward to Valentine's Day last year. It was Sunday and I'd gone to the 6pm service at Buckhead Church. My good friend Julie, as cute as she is, brought us all little Valentine's treats. After service, she asked if I wanted to go to a Fusion event (a gathering for non-marrieds at Buckhead Church). Now despite my newfound optimism, something about being at a singles function on Valentine's Day didn't sound too appealing to me. But since it was Julie that was asking, and she'd already bribed me with candy, how could I say no?

Although I was skeptical, that was the very day and the very place that I met Gabe - the love of my life. At first I was certain that he wasn't interested, but fortunately for me, he was. Granted it took him a little while to friend me on Facebook let alone ask for my number, but before long we were inseparable. Where and when I least expected it, I found love and I couldn't be happier.

So you're probably wondering what exactly this has to do with the red velvet cookies pictured above. Well, not quite much to be honest. But its Valentine's Day, and what goes better with a love story than some red velvet cookies (sorry they aren't heart shaped). These Red Velvet Black and White Cookies came from a Rachael Ray recipe and they were actually quite good. The recipe is really straightforward, but I'd recommend preparing the pans with grease and flour, as by just using parchment paper my cookies seemed to stick a little to the paper. Also, don't try and add extra hot water to the icing than the recipe calls for...its much easier to spread on when its thick.

To all of you, regardless of your status, I hope you have a wonderful Valentine's Day, full of love...and lots of red velvet.

UPDATE: Gabe proposed and I said yes (of course)!! We've entered Crate&Barrel's Ultimate Wedding Contest for a chance to win a 100K wedding. Its a long shot, but worth a try. Please vote for us here: http://www.ultimateweddingcontest.com/entry/126647. If we win, you know we will have the most ginormous and tasty red velvet wedding cake ever!

Quite a Doozie

DSC_7281Doozie (also doozy): Something that is extraordinary. Often used in the context of troublesome, difficult or problematic, but can be used positively as well.

As a kid I always loved going to Great American Cookie Company and getting a Double Doozie cookie. Nothing was better than a generous helping of frosting sandwiched between two freshly baked cookies.

Now one could infer that Great American Cookie Company coined the name "Double Doozie" because it is in fact, wonderful and extraordinary, but I beg to disagree. I like to think that this cookie originated after someone was having a horrendous, albeit "doozie" of a day. One of those days when you feel like you just can't... possibly... make... one... more... decision.

Do I want a cookie? Yes. Do I want cake? Yes. Do I want an entire vat of icing? Yes. Indulgence kicks in and before you know it, you're sitting with an empty pint of ice cream, spoon-in-hand, wondering why you feel left unsatisfied. Yes, one of those kinds of days.

Well thankfully for the advent of the Double Doozie, you can have it all - cookie/cake/frosting - in one single serving. What's more, these red velvet sandwich cookies are super easy to make and only take 10 minutes in the oven.

For these cookies I started with Paula Deen's recipe but modified the cocoa and the frosting. While I liked the fluffy, cake texture of the cookies, next time I want to experiment and make them a bit more chewy, and perhaps add in some chocolate chips. If you're making these for a party or gathering I'd double the recipe - this one makes about 12 sandwich cookies. Happy Baking!


Ingredients:
1 1/3 cups all-purpose flour
1 tablespoon plus 1 teaspoon cocoa powder
1 teaspoon baking powder
1/4 teaspoon baking soda
1/2 teaspoon salt
1/4 cup butter, room temperature
1 cup sugar
2 eggs
2 tablespoons buttermilk
2 teaspoons apple cider vinegar
1 teaspoon vanilla extract
1 tablespoon red food coloring
   
For the Cream Cheese Frosting:

1-8 ounce block cream cheese, softened
1 stick butter, softened
1 teaspoon vanilla extract
1 box (approx 4 1/2 cups sifted) powdered sugar
 

Directions:
Preheat oven to 375 degrees F. In a small bowl, mix together the flour, cocoa powder, baking powder, baking soda and salt. In a larger separate bowl, cream together the butter and sugar until light and fluffy, about 3 minutes. Add the eggs one at a time. Beat in the buttermilk, vinegar, vanilla and red food coloring. Once combined, add the dry ingredients to the wet. Mix until thoroughly combined.

Onto a parchment lined sheet tray, drop batter using a small ice cream scoop (or a heaping tablespoon). Bake for 10 minutes, until baked through. Cookies should be cake-like and light. Allow to cool for a few minutes on the baking sheet, then remove to a wire rack to cool completely. (I just slide the parchment from my baking sheet onto the wire rack).

In a large mixing bowl, beat the cream cheese, butter, and vanilla together until smooth. Sift in the sugar and on low speed, beat until incorporated. Increase the speed to high and mix until very light and fluffy. Carefully spread the cream cheese frosting between 2 cooled cookies. Makes approximately 12 sandwich cookies.

'Tis the Season (for Red Velvet)

I can't think of a better time of year to make red velvet. If you're looking for some holiday baking inspiration, I've included links to some fun red velvet recipes. I haven't been able to try them all, but can certainly vouch for the sources: from Southern Living, Paula Deen and a few of my favorite baking bloggers. These recipes are sure to get you right into the holiday spirit:

Photo: Jennifer Davick; Styling: Buffy Hargett
Red Velvet Brownies
Red Velvet Bread Pudding
Red Velvet Soufflés w/ Whipped Sour Cream
Red Velvet Trifle
Red Velvet Torte w/ White Truffle Frosting
Red Velvet Cheesecake
Red Velvet Fudge
Red Velvet Peppermint Cake
Red Velvet Angel Food Cake

But say you don't feel like baking. How about cozying up next to the fire with a warm cup of Red Velvet Hot Cocoa?

Or maybe you're having guests over for breakfast and want to whip up a simple holiday inspired treat? Just make a batch of my red velvet pancakes and buy a few of these cute little mitten pancake molds from Crate&Barrel (for less than $5 each). Pipe some cream cheese frosting onto the bottom of the mittens, and voila: red velvet pancake mittens!

Baking Away the Calories (Plus a Giveaway)

Baked red velvet mini doughnuts by the Velveteen BakerIn what seems like eons ago in the blogosphere, I aksed my readers what I should bake next and red velvet donuts were the clear winner.

I started with these cute little mini donut pans from Amazon and figured that by using them I would avoid burning myself with grease (highly probable) and dodge any excess, unnecessary calories. I quickly learned, however, that the calories are in fact my favorite part of the donut.

So I am posting this recipe with a caveat: if you are really craving a donut, I suggest eating a real doughnut (yes, different spelling). Preferably one with actual dough that has been submerged and deep fat fried in a massive vat of grease. Yes, it won't be the healthiest thing, but it can't be much worse than eating 12 baked mini donuts in a single sitting. Right?

But now onto the fun stuff! To apologize for being such a slacker on my postings of late, I've decided to give away two brand-new mini donut pans so all you health conscious folks can make baked donuts of your own! To enter, simply comment on this post with the name of your favorite holiday dessert (and it doesn't have to be red velvet). Deadline to enter is 5pm EST on December 13th has passed. One lucky winner will be chosen at random using random.org and announced on this post.

And the lucky winner is: Jainy! She was the third person to comment on this post with the name of her favorite holiday dessert. Jainy, please send an email to christina@velveteenbaker.com with your full name and mailing address.


Baked Red Velvet Donuts
Modified from Sprinkle Bakes

Donut batter:
2 c all purpose flour, sifted
3/4 c granulated sugar
2 t baking powder
1/2 t salt
3/4 c buttermilk
1 t vanilla extract
1 t red food coloring
1 T natural cocoa powder, not dutch-processed
2 eggs, lightly beaten
2 T butter, melted

Preheat oven to 425°F. Spray donut pan with nonstick cooking spray. In large mixing bowl, sift together all purpose flour, sugar, baking powder and salt. Make a paste with the cocoa and red food coloring. Add buttermilk, eggs, vanilla extract, butter and red paste mixture and beat until just combined.

Fill each donut cup approximately 3/4 of the way full. Bake 5-8 minutes or until the top of the donuts spring back when touched. Let cool in pan for 4–5 minutes before removing. Finish donuts with vanilla glaze. Donuts are best served fresh.

Vanilla glaze:
2 T hot water
2 c confectioner’ s sugar
1 T milk (I substituted buttermilk since it was all I had)
½ t vanilla extract

In small bowl, stir together all ingredients until sugar is completely dissolved. Use immediately to glaze donuts. You can either toss them in or dip just the tops. If the glaze starts to harden you can add more hot water.

Red Velvet Fever


DSCN0005, originally uploaded by Velveteen Baker.

At what point should I start worrying about my red velvet addiction? Truth be told, I actually considered buying two boxes of these.

"So My Chocolate Should Have a Temper???" And Other Baking Discoveries

I'm getting ready to leave for Cambodia in two weeks and promised some friends I would make them some more red velvet cake truffles before I left.
But wait, these cake truffles, well...they look just like your cake balls?
Ah, you are quite right! Needless to say, I was bringing said cake truffles to my production team at church. And although it may seem silly, I felt that cake 'truffles' were much more PC than cake 'balls'. Am I right?

While my last recipe went over quite well, I didn't think the chocolate bark from Kroger was befitting of the title truffle, so I decided to use a higher quality chocolate. For this task, no 'chocolate flavored candy' would do.

Actually I just happened to have some bars of Ghirardelli semi-sweet chocolate on hand, so I figured it couldn't be that complicated. And I was right...at first. I used a double boiler and melted the chocolate bars (it took me a total of 8 bars). I pulled my red velvet cake balls out of the freezer, dipped each in the chocolate and then laid them gently onto a fresh sheet of parchment. Easy-peasy. The Ghirardelli chocolate made a marked improvement in the flavor and they looked pretty good too. I took them into church and to work the following Monday. They received rave reviews and a few people even expressed interest in buying some over the holidays and for a wedding.

The following morning however, I woke up and my beautiful cake balls, err, truffles looked like this (pictured below). I didn't refrigerate them and they were stored in a sealed container. What could I have done wrong?

These truffles had a bad temper!
As it turns out, chocolate should be tempered when used for coating or dipping. Yes, I had no idea what that meant until I Googled it. Those heinous looking spots are called fat blooms, and despite their appearance the chocolate is still fine to eat. Fat blooms are an accumulation of cocoa butter crystals on the chocolate's surface. One of the common causes is due to poor (or complete disregard of) tempering of the chocolate. If chocolate is properly tempered it will appear much more glossy and will form a crisp shell.

So there you have it. I guess some things are good with a little temper. Lesson learned for the Velveteen Baker. To avoid my little snafu, you can watch this video from Ghirardelli about how to properly temper chocolate.

A Cupcakery Worthy of its Namesake?


When I first heard about Red Velvet Cupcakery in DC's Chinatown from my friends Marcy and Tia, it was like a beacon. For nights I dreamed about trying a red velvet cupcake worthy of naming a bakery after. Fortunately it would only be a number of days until I had to travel to Virginia for work, and I would be able to make my dreams a reality.

I was able to lure four of my colleagues to the cupcakery for a pre-dinner cupcake run. There were Peanut Butter Cup cupcakes...Cookies & Cream cupcakes....and alas, the Southern Belle. A signature red velvet that can "stand up to Grandma's" or so the menu says. At first glance I have to admit that I was a little disappointed. All of their red velvet cupcakes were a deep shade of mahogany and had a serious case of muffin top. But looks can always be deceiving, right?


Despite my initial hesitation, I went all out. I ordered the red velvet, a peanut butter cup and a soy milk to wash it all down. The frosting was a standard cream cheese with just the right amount of sweetness. The cake however, was a sure disappointment. My colleagues and I all agreed that the red velvet cake tasted dry and over-baked. The net of it: I wouldn't name my bakery after it.

I'm hoping this was just a fluke and maybe their Quality Control Manager was out sick that day. Have any of you been to Red Velvet Cupcakery in DC? How was your experience? Any other DC area bakeries you would recommend?

Same Same, But Different

I'm looking to my readers to see what I should bake next. There are so many red velvet variations on my list that I simply cannot choose. So far the contenders are:
  • Red wine velvet cake - A classic red velvet with a red wine reduction in the batter.
  • Red velvet cake donuts, frosted of course.
  • Gluten-free red velvet cupcakes - for all of you cupcake (but not gluten) lovers out there.
  • Red velvet cake with beets - A red velvet cake colored with beets instead of food dye.
  • Red velvet whoopie pies - Cream cheese frosting sandwiched between two cookie-sized rounds of red velvet cake.
You can vote in my comments section, on my Facebook page, or by using the poll to the right hand side of this post. I'll feature the winning recipe and photos in an upcoming post. Thanks for participating!

Much Ado About Cake Balls

Several weeks back I did a post on the JWT Atlanta blog called The Next Big Thing Could Actually be, Quite Small and asserted my prediction that cake balls were going to be all the rage. Well today I am here to tell you that they are.

Red Velvet Cake Balls w/ Milk ChocolateI was at first a skeptic, but after making some red velvet cake balls from scratch I was truly convinced. There is something so heavenly about homemade red velvet cake and cream cheese icing mixed together, blanked by a nice, rich coating of chocolate.

I'm not going to lie, these little beauties are pretty labor intensive if you make them from scratch. As a matter of fact, you may start to hate me half way through this process and wonder why you ever decided to make these. But this is when you must press on. I assure you that all of your frustration will be worth its weight in gold once you bite into one of these.

Should you choose to make these, here are a few pointers I'd like to offer:
- Find a Kroger and buy a package of their white or dark chocolate bark. You can also use candy melts, but I found them much more difficult to work with.
- Invest in a candy dipping fork or set like this one. Spend a few more dollars on the metal dipping fork, as I rendered my plastic set useless trying to make these.
- You can use any red velvet cake and frosting recipe, but the following is one of my own. If you use another recipe you will need a 9x13 cake, about 2 cups of frosting and 1 or 2 packages of chocolate bark (depending on how much of a perfectionist you are).

For the red velvet cake:
2 1/2 c + 5T cake flour, sift before measuring
1 1/2 c sugar
1t baking soda
1t salt
1T + 1t natural cocoa powder, not dutch-processed
1 1/2 c vegetable oil
1 c buttermilk, room temperature
2 large eggs, room temperature
2T red food coloring
1t white distilled vinegar
1t pure madagascar vanilla

For the cream cheese icing:
2 1/4 c confectioners sugar sifted
4oz (1/2 a block) of cream cheese, softened
1/4 c mascarpone cheese
4T unsalted butter, softened
1/2t pure madagascar vanilla

For the candy coating:
1 or 2 packages of white, milk or dark chocolate bark (while I liked the way the white chocolate looked, the milk/dark chocolate tasted much better). I recommend getting two packages since the chocolate tends to get messy after a while with crumbs from the cake balls.

Directions:
Preheat the oven to 350. In a medium bowl, sift together the flour (pre-measured and sifted), sugar, cocoa, baking soda and salt. In a large bowl, gently beat (speed 1 or 2 of a handheld mixer) the oil, buttermilk, eggs, vinegar, vanilla and red food coloring until blended. Add in the dry ingredients slowly and beat (speed of 1 or 2) until smooth. Pour into a lined and greased 9x13 pan.

Bake at 350 for approximately 30 minutes, turning once half way through. Cool in pan for no more than 10 minutes, then transfer to a wire rack to cool completely. Once your cake has cooled, shave off any hard edges of the cake using a serrated knife.

In a large bowl beat the cream cheese, mascarpone, butter and vanilla until smooth. Slowly sift in the confectioners sugar and beat on a low speed until incorporated. Increase the speed until fully blended. Now here's the fun part. Take your cake and crumble it into a large mixing bowl. Add up to two cups of the cream cheese icing and mix with a spatula (or with your hands if you don't mind getting a little messy) until fully incorporated. It will be the consistency of a thick dough. Roll the mixture into balls and lay onto a cookie sheet. Place in the freezer until ready to coat in chocolate.

Before coating the cake balls must chilled, but not completely frozen. Melt the chocolate bark in microwave according to directions on package. Dip and cover one cake ball at a time using either a spoon or a dipping fork and place on a parchment lined cookie sheet. I like to take one or two cake balls out of the freezer at a time, as they are easier to work with that way. You can cover up any mishaps with a second coating (or drizzle) of chocolate once the first layer has hardened.

Good luck and let me know how it goes!

Cupcake Critique: Matty Cakes (Atlanta, GA)

DSC_3907
Nice texture and crumb, but the icing didn't blow me away.
So I've driven by Matty Cakes hundreds of times, but had yet to try out this Best of Atlanta bakery. Finally on one of my tasting spree Saturdays (sure beats the gym folks), I was able to stop in. While intent on trying their red velvet, I found myself completely awestruck by a designer purse cake they were making. These fondant covered cakes looked better than some of the bags I've seen on Canal Street. As tempted as I was to order a $140 purse made out of cake, I had to remind myself that I was there just to try their red velvet.

The one thing I like about Matty Cakes is that their prices are super reasonable. Their large cupcake is ginormous and only $2.95. To give you an idea of scale, I took a picture of it on top of a quart of paint, and as you can see, it takes up the majority of its surface area. What they call their "mini" cupcake, is in fact a regular sized cupcake that sells for $1.95.

Now for the red velvet. The cake itself was quite good - the flavor was nice, the texture was moist and the color was a beautiful shade of crimson. I found myself a little disappointed however with the icing. It had a very light whipped cream cheese flavor. It would've been fabulous atop a strawberry shortcake, but it didn't quite stand up to the red velvet for me.

Red Velvet Cupcakes @ Matty Cakes No. 7
A large cupcake from Matty Cakes is almost equivalent
to the circumference of a quart of BEHR paint.
Red Velvet Cupcakes @ Matty Cakes No. 4
What I consider to be the ideal color for red velvet.

Waiting for Gâteau

Remember that book Waiting for Godot that many of us had to read in high school? Well I'm sure none of you felt like Vladimir and Estragon, eagerly awaiting my next post about gâteau (that's French for cake), but I'm here to assure you that I have several new reviews, recipes and stories to share.

In the last two weeks alone, I've done tastings in New Orleans and DC, as well as baked (and blogged about) the yummy cake balls pictured below. It's all coming soon, so don't forget to subscribe to my posts (top right under subscribe). You can also follow my updates on twitter or like The Velveteen Baker on Facebook.