To Bake, or Not to Bake (Anthro Giveaway!)

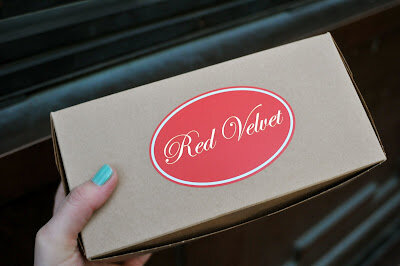
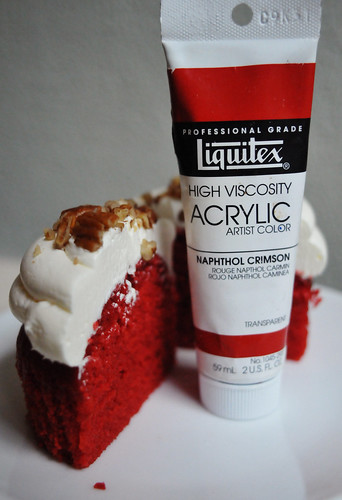
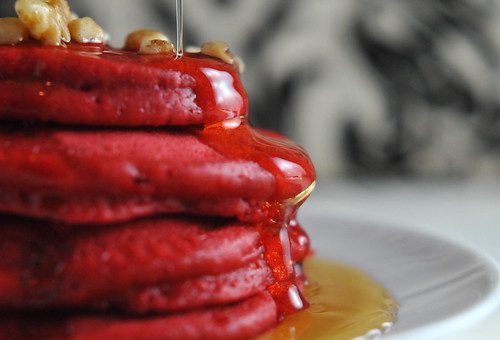
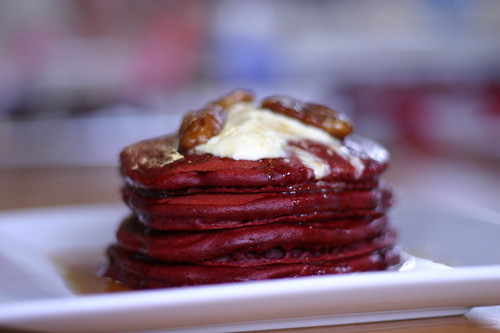
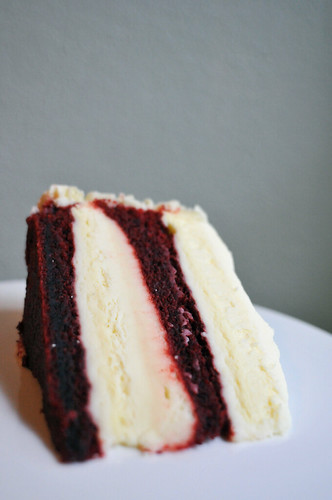
I'm obsessed with this color right now.

As many of you probably know from my earlier posts, I recently got engaged and am in full planning mode. Planning a wedding is no easy task, especially when you are on a tight budget. My fiance and I have been trying to find ways to cut costs, and also to make the wedding reflective of who we are as a couple.

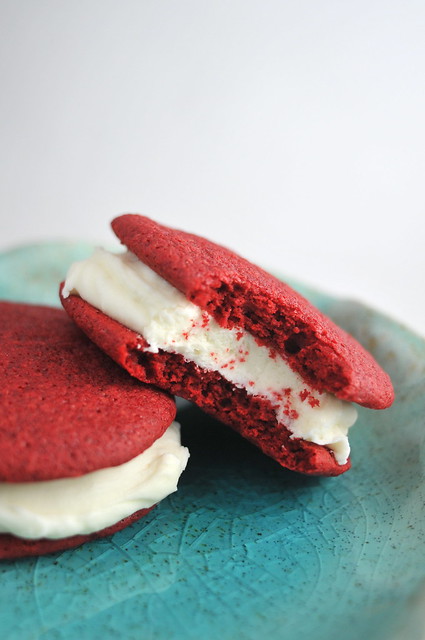
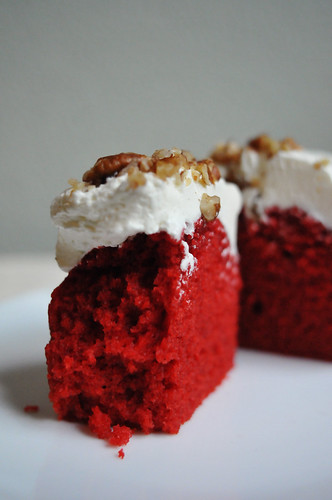
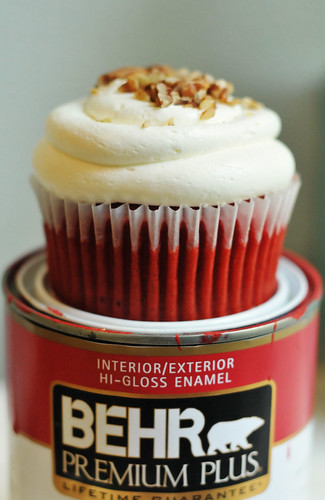
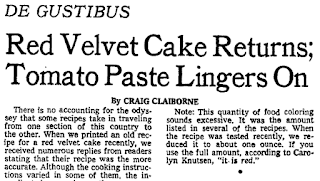
So recently I've been toying with the idea of baking for my own wedding. But not just the obvious red velvet cake. I'm thinking a whole dessert table chock full of red-velvety goodness. Red velvet cupcakes, red velvet cake balls, red velvet double doozies, red velvet trifle, red velvet cheesecake...I think you get the picture.

Here is my thought process: if the base recipe for several of these is the same (cake balls, trifle, cupcakes, etc), would it really be that difficult to make enough of these things to feed 100 people? Mind you, I'd probably need to make all of it 1-2 days prior to my wedding. I'd love to get thoughts from anyone who's attempted something like this before.

**ANTHROPOLOGIE GIVEAWAY**

Now onto the giveaway, my fiance and I have entered

Crate & Barrel's Ultimate Wedding Contest

, and are just 100 or so votes away from advancing to the next round. We could really use your help and support, but of course I want to offer you something in return. I love everything about Anthropologie, and I think that every baker (or cook) should have one of their fabulous little aprons. My fiance actually bought me one for Christmas and had it embroidered with "The Velveteen Baker". I absolutely love it, and even when I'm covered in flour and red food dye, I still feel fabulous in it.

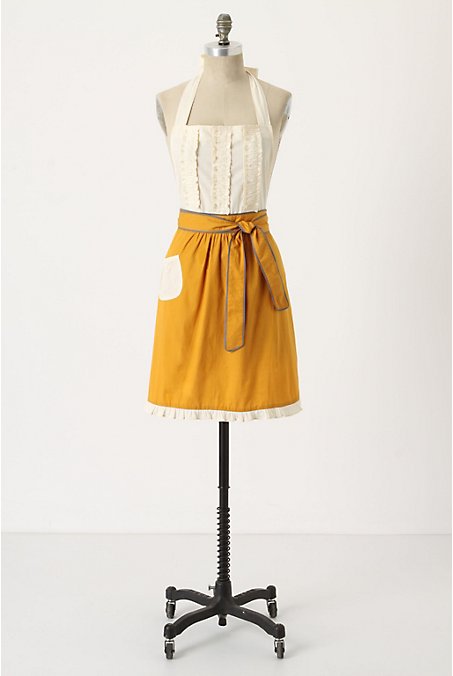
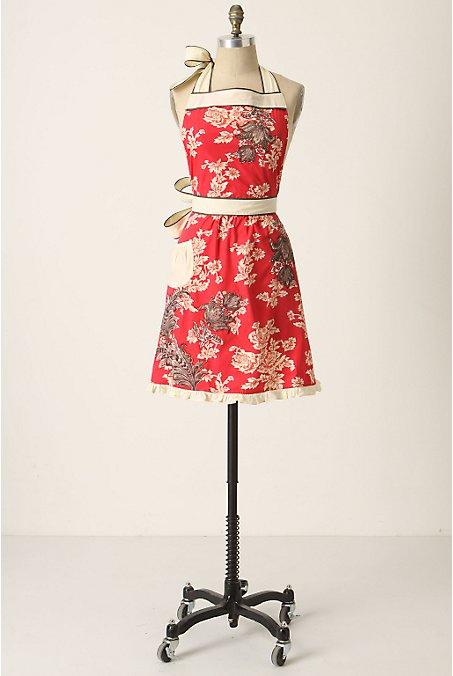
So here is the deal. One lucky winner will get to take their pick of one of these chic

aprons

from Anthropologie. There are three ways to enter, so even if you've already voted for us you still have a chance to win.

How to Enter:

  • Vote for my fiance and I in Crate & Barrel's Ultimate Wedding Contest http://www.ultimateweddingcontest.com/entry/126647(detailed instructions below),  then come back here and comment on this post which number vote you were (ie "Vote #525"). 

  • If you’re on Twitter, receive an extra entry by tweeting the below (tell me you’ve tweeted, by leaving an extra blog comment): "Win an @Anthropologie apron from @velveteenbaker: http://bit.ly/gSK5Gc #giveaway"

  • Get an extra entry if you post about this contest on your blog, or share it with your friends on Facebook asking them to vote for us. Must include this link http://bit.ly/hlTRaL (again, leave an extra blog comment here so I know you posted).

**Entries closed.**

One winner will be randomly selected. Anonymous comments, or those that don't follow the instructions will not be counted. If I am not able to contact the winner, another winner will be selected.

Entries will be accepted until noon on Sunday, April 24th (EST) and the winner will be announced and contacted shortly thereafter. UPDATE: I AM EXTENDING THIS CONTEST UNTIL APRIL 29th! I'm still getting more entries come in and I feel awful not including them. Besides, we still need more votes (can you blame me?). Thanks so much for the support!! Winner will be announced after April 29th.

How to Vote (detailed instructions):

STEP 1: Go to

http://www.

ultimateweddingcontest.com/

entry/126647

STEP 2: Click the pink "VOTE" button

STEP 3: Scroll down and either

Login with Facebook

-OR-

Register

with your email address.

If you login with Facebook (easiest way to vote):

STEP 4: Click "Allow" for Request for Permission. It will take you back to the contest page and a pop-up that says your vote has been counted will appear.

STEP 5: Come back to this post and comment which number you were

back here (ie "Vote #525" - you'll see it on the contest page)

.

If you vote via email:

STEP 4: Provide your first and last name, email address and a password

STEP 5: Check your email for a message from "Ultimate Wedding Contest" and click to confirm your address.

It will take you back to the contest page and a pop-up that says your vote has been counted will appear.

STEP 6:

Come back to this post and comment which number you were

back here (ie "Vote #525" - you'll see it on the contest page)

.

**WINNER ANNOUNCED**

I've picked a winner! The winner was randomly selected using random.org after any incomplete or anonymous entries were removed. And the winner is...comment #34, Krista from

In Krista's Kitchen

. Congratulations Krista! I'll be emailing you with details so you can pick out which fabulous apron you'd like to have!

Adorable!

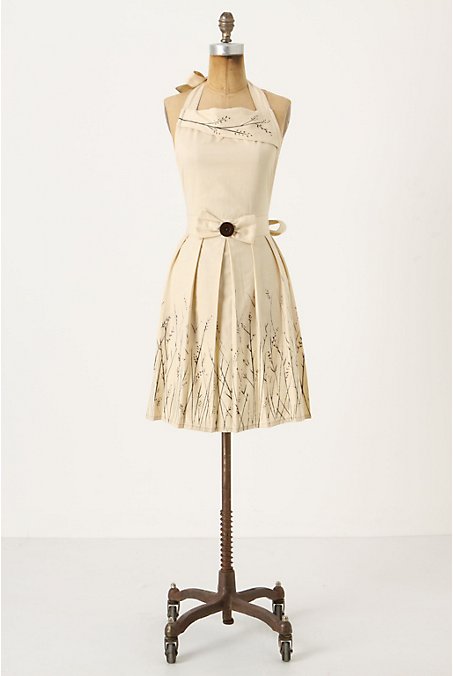
Love the pleats and cute little bow!

Quite a Doozie

DSC_7281Doozie (also doozy): Something that is extraordinary. Often used in the context of troublesome, difficult or problematic, but can be used positively as well.

As a kid I always loved going to Great American Cookie Company and getting a Double Doozie cookie. Nothing was better than a generous helping of frosting sandwiched between two freshly baked cookies.

Now one could infer that Great American Cookie Company coined the name "Double Doozie" because it is in fact, wonderful and extraordinary, but I beg to disagree. I like to think that this cookie originated after someone was having a horrendous, albeit "doozie" of a day. One of those days when you feel like you just can't... possibly... make... one... more... decision.

Do I want a cookie? Yes. Do I want cake? Yes. Do I want an entire vat of icing? Yes. Indulgence kicks in and before you know it, you're sitting with an empty pint of ice cream, spoon-in-hand, wondering why you feel left unsatisfied. Yes, one of those kinds of days.

Well thankfully for the advent of the Double Doozie, you can have it all - cookie/cake/frosting - in one single serving. What's more, these red velvet sandwich cookies are super easy to make and only take 10 minutes in the oven.

For these cookies I started with Paula Deen's recipe but modified the cocoa and the frosting. While I liked the fluffy, cake texture of the cookies, next time I want to experiment and make them a bit more chewy, and perhaps add in some chocolate chips. If you're making these for a party or gathering I'd double the recipe - this one makes about 12 sandwich cookies. Happy Baking!


Ingredients:
1 1/3 cups all-purpose flour
1 tablespoon plus 1 teaspoon cocoa powder
1 teaspoon baking powder
1/4 teaspoon baking soda
1/2 teaspoon salt
1/4 cup butter, room temperature
1 cup sugar
2 eggs
2 tablespoons buttermilk
2 teaspoons apple cider vinegar
1 teaspoon vanilla extract
1 tablespoon red food coloring
   
For the Cream Cheese Frosting:

1-8 ounce block cream cheese, softened
1 stick butter, softened
1 teaspoon vanilla extract
1 box (approx 4 1/2 cups sifted) powdered sugar
 

Directions:
Preheat oven to 375 degrees F. In a small bowl, mix together the flour, cocoa powder, baking powder, baking soda and salt. In a larger separate bowl, cream together the butter and sugar until light and fluffy, about 3 minutes. Add the eggs one at a time. Beat in the buttermilk, vinegar, vanilla and red food coloring. Once combined, add the dry ingredients to the wet. Mix until thoroughly combined.

Onto a parchment lined sheet tray, drop batter using a small ice cream scoop (or a heaping tablespoon). Bake for 10 minutes, until baked through. Cookies should be cake-like and light. Allow to cool for a few minutes on the baking sheet, then remove to a wire rack to cool completely. (I just slide the parchment from my baking sheet onto the wire rack).

In a large mixing bowl, beat the cream cheese, butter, and vanilla together until smooth. Sift in the sugar and on low speed, beat until incorporated. Increase the speed to high and mix until very light and fluffy. Carefully spread the cream cheese frosting between 2 cooled cookies. Makes approximately 12 sandwich cookies.

'Tis the Season (for Red Velvet)

I can't think of a better time of year to make red velvet. If you're looking for some holiday baking inspiration, I've included links to some fun red velvet recipes. I haven't been able to try them all, but can certainly vouch for the sources: from Southern Living, Paula Deen and a few of my favorite baking bloggers. These recipes are sure to get you right into the holiday spirit:

Photo: Jennifer Davick; Styling: Buffy Hargett
Red Velvet Brownies
Red Velvet Bread Pudding
Red Velvet Soufflés w/ Whipped Sour Cream
Red Velvet Trifle
Red Velvet Torte w/ White Truffle Frosting
Red Velvet Cheesecake
Red Velvet Fudge
Red Velvet Peppermint Cake
Red Velvet Angel Food Cake

But say you don't feel like baking. How about cozying up next to the fire with a warm cup of Red Velvet Hot Cocoa?

Or maybe you're having guests over for breakfast and want to whip up a simple holiday inspired treat? Just make a batch of my red velvet pancakes and buy a few of these cute little mitten pancake molds from Crate&Barrel (for less than $5 each). Pipe some cream cheese frosting onto the bottom of the mittens, and voila: red velvet pancake mittens!

Baking Away the Calories (Plus a Giveaway)

Baked red velvet mini doughnuts by the Velveteen BakerIn what seems like eons ago in the blogosphere, I aksed my readers what I should bake next and red velvet donuts were the clear winner.

I started with these cute little mini donut pans from Amazon and figured that by using them I would avoid burning myself with grease (highly probable) and dodge any excess, unnecessary calories. I quickly learned, however, that the calories are in fact my favorite part of the donut.

So I am posting this recipe with a caveat: if you are really craving a donut, I suggest eating a real doughnut (yes, different spelling). Preferably one with actual dough that has been submerged and deep fat fried in a massive vat of grease. Yes, it won't be the healthiest thing, but it can't be much worse than eating 12 baked mini donuts in a single sitting. Right?

But now onto the fun stuff! To apologize for being such a slacker on my postings of late, I've decided to give away two brand-new mini donut pans so all you health conscious folks can make baked donuts of your own! To enter, simply comment on this post with the name of your favorite holiday dessert (and it doesn't have to be red velvet). Deadline to enter is 5pm EST on December 13th has passed. One lucky winner will be chosen at random using random.org and announced on this post.

And the lucky winner is: Jainy! She was the third person to comment on this post with the name of her favorite holiday dessert. Jainy, please send an email to christina@velveteenbaker.com with your full name and mailing address.


Baked Red Velvet Donuts
Modified from Sprinkle Bakes

Donut batter:
2 c all purpose flour, sifted
3/4 c granulated sugar
2 t baking powder
1/2 t salt
3/4 c buttermilk
1 t vanilla extract
1 t red food coloring
1 T natural cocoa powder, not dutch-processed
2 eggs, lightly beaten
2 T butter, melted

Preheat oven to 425°F. Spray donut pan with nonstick cooking spray. In large mixing bowl, sift together all purpose flour, sugar, baking powder and salt. Make a paste with the cocoa and red food coloring. Add buttermilk, eggs, vanilla extract, butter and red paste mixture and beat until just combined.

Fill each donut cup approximately 3/4 of the way full. Bake 5-8 minutes or until the top of the donuts spring back when touched. Let cool in pan for 4–5 minutes before removing. Finish donuts with vanilla glaze. Donuts are best served fresh.

Vanilla glaze:
2 T hot water
2 c confectioner’ s sugar
1 T milk (I substituted buttermilk since it was all I had)
½ t vanilla extract

In small bowl, stir together all ingredients until sugar is completely dissolved. Use immediately to glaze donuts. You can either toss them in or dip just the tops. If the glaze starts to harden you can add more hot water.

"So My Chocolate Should Have a Temper???" And Other Baking Discoveries

I'm getting ready to leave for Cambodia in two weeks and promised some friends I would make them some more red velvet cake truffles before I left.
But wait, these cake truffles, well...they look just like your cake balls?
Ah, you are quite right! Needless to say, I was bringing said cake truffles to my production team at church. And although it may seem silly, I felt that cake 'truffles' were much more PC than cake 'balls'. Am I right?

While my last recipe went over quite well, I didn't think the chocolate bark from Kroger was befitting of the title truffle, so I decided to use a higher quality chocolate. For this task, no 'chocolate flavored candy' would do.

Actually I just happened to have some bars of Ghirardelli semi-sweet chocolate on hand, so I figured it couldn't be that complicated. And I was right...at first. I used a double boiler and melted the chocolate bars (it took me a total of 8 bars). I pulled my red velvet cake balls out of the freezer, dipped each in the chocolate and then laid them gently onto a fresh sheet of parchment. Easy-peasy. The Ghirardelli chocolate made a marked improvement in the flavor and they looked pretty good too. I took them into church and to work the following Monday. They received rave reviews and a few people even expressed interest in buying some over the holidays and for a wedding.

The following morning however, I woke up and my beautiful cake balls, err, truffles looked like this (pictured below). I didn't refrigerate them and they were stored in a sealed container. What could I have done wrong?

These truffles had a bad temper!
As it turns out, chocolate should be tempered when used for coating or dipping. Yes, I had no idea what that meant until I Googled it. Those heinous looking spots are called fat blooms, and despite their appearance the chocolate is still fine to eat. Fat blooms are an accumulation of cocoa butter crystals on the chocolate's surface. One of the common causes is due to poor (or complete disregard of) tempering of the chocolate. If chocolate is properly tempered it will appear much more glossy and will form a crisp shell.

So there you have it. I guess some things are good with a little temper. Lesson learned for the Velveteen Baker. To avoid my little snafu, you can watch this video from Ghirardelli about how to properly temper chocolate.

A Cupcakery Worthy of its Namesake?


When I first heard about Red Velvet Cupcakery in DC's Chinatown from my friends Marcy and Tia, it was like a beacon. For nights I dreamed about trying a red velvet cupcake worthy of naming a bakery after. Fortunately it would only be a number of days until I had to travel to Virginia for work, and I would be able to make my dreams a reality.

I was able to lure four of my colleagues to the cupcakery for a pre-dinner cupcake run. There were Peanut Butter Cup cupcakes...Cookies & Cream cupcakes....and alas, the Southern Belle. A signature red velvet that can "stand up to Grandma's" or so the menu says. At first glance I have to admit that I was a little disappointed. All of their red velvet cupcakes were a deep shade of mahogany and had a serious case of muffin top. But looks can always be deceiving, right?


Despite my initial hesitation, I went all out. I ordered the red velvet, a peanut butter cup and a soy milk to wash it all down. The frosting was a standard cream cheese with just the right amount of sweetness. The cake however, was a sure disappointment. My colleagues and I all agreed that the red velvet cake tasted dry and over-baked. The net of it: I wouldn't name my bakery after it.

I'm hoping this was just a fluke and maybe their Quality Control Manager was out sick that day. Have any of you been to Red Velvet Cupcakery in DC? How was your experience? Any other DC area bakeries you would recommend?

Much Ado About Cake Balls

Several weeks back I did a post on the JWT Atlanta blog called The Next Big Thing Could Actually be, Quite Small and asserted my prediction that cake balls were going to be all the rage. Well today I am here to tell you that they are.

Red Velvet Cake Balls w/ Milk ChocolateI was at first a skeptic, but after making some red velvet cake balls from scratch I was truly convinced. There is something so heavenly about homemade red velvet cake and cream cheese icing mixed together, blanked by a nice, rich coating of chocolate.

I'm not going to lie, these little beauties are pretty labor intensive if you make them from scratch. As a matter of fact, you may start to hate me half way through this process and wonder why you ever decided to make these. But this is when you must press on. I assure you that all of your frustration will be worth its weight in gold once you bite into one of these.

Should you choose to make these, here are a few pointers I'd like to offer:
- Find a Kroger and buy a package of their white or dark chocolate bark. You can also use candy melts, but I found them much more difficult to work with.
- Invest in a candy dipping fork or set like this one. Spend a few more dollars on the metal dipping fork, as I rendered my plastic set useless trying to make these.
- You can use any red velvet cake and frosting recipe, but the following is one of my own. If you use another recipe you will need a 9x13 cake, about 2 cups of frosting and 1 or 2 packages of chocolate bark (depending on how much of a perfectionist you are).

For the red velvet cake:
2 1/2 c + 5T cake flour, sift before measuring
1 1/2 c sugar
1t baking soda
1t salt
1T + 1t natural cocoa powder, not dutch-processed
1 1/2 c vegetable oil
1 c buttermilk, room temperature
2 large eggs, room temperature
2T red food coloring
1t white distilled vinegar
1t pure madagascar vanilla

For the cream cheese icing:
2 1/4 c confectioners sugar sifted
4oz (1/2 a block) of cream cheese, softened
1/4 c mascarpone cheese
4T unsalted butter, softened
1/2t pure madagascar vanilla

For the candy coating:
1 or 2 packages of white, milk or dark chocolate bark (while I liked the way the white chocolate looked, the milk/dark chocolate tasted much better). I recommend getting two packages since the chocolate tends to get messy after a while with crumbs from the cake balls.

Directions:
Preheat the oven to 350. In a medium bowl, sift together the flour (pre-measured and sifted), sugar, cocoa, baking soda and salt. In a large bowl, gently beat (speed 1 or 2 of a handheld mixer) the oil, buttermilk, eggs, vinegar, vanilla and red food coloring until blended. Add in the dry ingredients slowly and beat (speed of 1 or 2) until smooth. Pour into a lined and greased 9x13 pan.

Bake at 350 for approximately 30 minutes, turning once half way through. Cool in pan for no more than 10 minutes, then transfer to a wire rack to cool completely. Once your cake has cooled, shave off any hard edges of the cake using a serrated knife.

In a large bowl beat the cream cheese, mascarpone, butter and vanilla until smooth. Slowly sift in the confectioners sugar and beat on a low speed until incorporated. Increase the speed until fully blended. Now here's the fun part. Take your cake and crumble it into a large mixing bowl. Add up to two cups of the cream cheese icing and mix with a spatula (or with your hands if you don't mind getting a little messy) until fully incorporated. It will be the consistency of a thick dough. Roll the mixture into balls and lay onto a cookie sheet. Place in the freezer until ready to coat in chocolate.

Before coating the cake balls must chilled, but not completely frozen. Melt the chocolate bark in microwave according to directions on package. Dip and cover one cake ball at a time using either a spoon or a dipping fork and place on a parchment lined cookie sheet. I like to take one or two cake balls out of the freezer at a time, as they are easier to work with that way. You can cover up any mishaps with a second coating (or drizzle) of chocolate once the first layer has hardened.

Good luck and let me know how it goes!

Cupcake Critique: Matty Cakes (Atlanta, GA)

DSC_3907
Nice texture and crumb, but the icing didn't blow me away.
So I've driven by Matty Cakes hundreds of times, but had yet to try out this Best of Atlanta bakery. Finally on one of my tasting spree Saturdays (sure beats the gym folks), I was able to stop in. While intent on trying their red velvet, I found myself completely awestruck by a designer purse cake they were making. These fondant covered cakes looked better than some of the bags I've seen on Canal Street. As tempted as I was to order a $140 purse made out of cake, I had to remind myself that I was there just to try their red velvet.

The one thing I like about Matty Cakes is that their prices are super reasonable. Their large cupcake is ginormous and only $2.95. To give you an idea of scale, I took a picture of it on top of a quart of paint, and as you can see, it takes up the majority of its surface area. What they call their "mini" cupcake, is in fact a regular sized cupcake that sells for $1.95.

Now for the red velvet. The cake itself was quite good - the flavor was nice, the texture was moist and the color was a beautiful shade of crimson. I found myself a little disappointed however with the icing. It had a very light whipped cream cheese flavor. It would've been fabulous atop a strawberry shortcake, but it didn't quite stand up to the red velvet for me.

Red Velvet Cupcakes @ Matty Cakes No. 7
A large cupcake from Matty Cakes is almost equivalent
to the circumference of a quart of BEHR paint.
Red Velvet Cupcakes @ Matty Cakes No. 4
What I consider to be the ideal color for red velvet.

Waiting for Gâteau

Remember that book Waiting for Godot that many of us had to read in high school? Well I'm sure none of you felt like Vladimir and Estragon, eagerly awaiting my next post about gâteau (that's French for cake), but I'm here to assure you that I have several new reviews, recipes and stories to share.

In the last two weeks alone, I've done tastings in New Orleans and DC, as well as baked (and blogged about) the yummy cake balls pictured below. It's all coming soon, so don't forget to subscribe to my posts (top right under subscribe). You can also follow my updates on twitter or like The Velveteen Baker on Facebook.


Red Velvet: It's Not Just for Dessert Anymore

So my first attempt at red velvet pancakes (technically my first attempt at pancakes, ever) and they were actually quite successful. I started with two different recipes, but thought they had too much cocoa and not enough buttermilk, so I ended up just scrapping both and winging it. I was pleasantly surprised that they turned out and were actually really good. Fluffy with a nice velvety texture and not too sweet. Next time I'll probably add some cream cheese to the topping (in lieu of the creme fraiche), but was a little too impatient to wait for it to soften. Try them out and let me know what you think.


Teen's Red Velvet Pancakes No. 5

Teen's Red Velvet Pancakes No. 6

Teen's Red Velvet Pancakes
Yields about 16 pancakes

For the Red Velvet Pancakes:
1 cup all-purpose flour, sifted twice after measuring
1/2 teaspoon baking powder
1 1/2 teaspoon baking soda
1/4 teaspoon salt
3 tablespoons white sugar
1 tablespoon unsweetened cocoa powder
2 large eggs, lightly beaten
1 cup buttermilk
1/4 cup creme fraiche
4 tablespoons unsalted butter, melted
1 tablespoon red food coloring
1 teaspoon vanilla extract
1/2 cup walnuts (or pecans), toasted

For the Mascarpone Topping:
1/3 cup softened mascarpone
1/4 cup creme fraiche
1 cup confectioners sugar
1/4 teaspoon vanilla extract

Cook walnuts in a skillet at medium-high heat for 3 to 5 minutes, stirring frequently. In a large bowl whisk together the dry ingredients. In a separate bowl whisk together the eggs, buttermilk, creme fraiche, melted butter, red food coloring and vanilla extract. Add in the dry ingredients and walnuts (reserve some for garnish) and whisk until combined. The batter will have a thick consistency.

Heat a frying pan or griddle over medium heat. Add butter to grease, followed by a small scoop of the batter. Wait for the pancakes to bubble, flip and cook for another minute or two. Meanwhile, mix all of the ingredients for the mascarpone topping together and garnish along with maple syrup and remaining walnuts.

Red Velvet Meets Breakfast, Lives Happily Ever After

You have to imagine my surprise when I discovered this whole red velvet pancake phenomenon. I mean, how could I not see this one coming? They have so much in common that one day they were just destined to meet and hit it off, right?

Well, it sounds like a viable reason to bake again this weekend. Red velvet flapjacks anyone?

 Red Velvet Pancakes with Mascarpone; thekitchykitchen.blogspot.com
Red Velvet Pancakes from thebreakfastcook.com
With Whipped Cream Cheese & Butter Pecan Syrup; thebreakfastcook.com

Give More, Save More (Calories)

Stephanie’s Ultimate Red Velvet Cake Cheesecake™ #5After my last post I was overwhelmed with guilt. Even in the name of National Cheesecake Day, how could I possibly attempt to endorse something I hadn't yet tried myself? So off to The Cheesecake Factory I went for a slice of Stephanie's Ultimate Red Velvet Cake Cheesecake.

I found it rather annoying that their Any Slice, Half Price offer was only good for those dining in (go figure), but after going through the trouble of getting there and parking after 5pm on a Friday, I figured my dignity was well worth a $9 slice of cheesecake.

So how did it fare? While the layers of red velvet were relatively bland, being sandwiched between cheesecake and cream cheese icing certainly made the cake. Overall it was pretty good. Worth trying, but don't go expecting it will blow your mind.

I do think its great that they donate part of their proceeds to Feeding America, but you too directly through their site. Every dollar you donate helps provide 9 pounds of food and grocery products to men, women and children facing hunger in our country. So in lieu of buying a slice that translates to only 2.25 pounds of food, you can donate your $9 to Feeding America instead, which would provide 81 pounds of food.

Much better for the waistline, and for those in need.

Celebrate Cheesecake, Eat Red Velvet

In case you weren't aware, today is National Cheesecake Day. And what better way to celebrate cheesecake than by eating red velvet!

If you head over to The Cheesecake Factory today you can try their Stephanie’s Ultimate Red Velvet Cake Cheesecake™ for half-off with their Any Slice, Half Price promotion. While I haven't had an opportunity to sample their red velvet rendition, how could Cheesecake Factory's original cheesecake, layered with red velvet cake and topped with cream cheese frosting not be good?

In case that isn't reason enough, 25¢ from the sale of each red velvet slice will be donated to Feeding America, the nation's largest domestic hunger-relief charity.

National Cheesecake Day is only once a year, so go out and celebrate! You can afford the extra calories.

Study Shows Ad Execs Prefer Younger Cakes

Red Velvet w/ Ermine Icing No. 3
For my latest baking adventure I decided to pit two recipes against each other. Both were featured in the New York Times, but published 30 years apart. I wanted to see if people preferred the younger, more contemporary cake (circa 2007) to the older, more traditional one (circa 1977).

As prefaced in an earlier post, today I brought both cakes into my office to conduct a 'taste' study. As part of the survey, I asked that all participants taste both cakes and rate them on a scale of 1-10. Of the 35 advertising executives included in this study, the vast majority preferred the younger (2007) version.

First Runner Up: Circa 1977 Cake (pictured top left)
The older cake hailed from Alabama and was published on April 25, 1977 in an article entitled Red Velvet Cake Returns, Tomato Paste Lingers On (I assure you the recipe has nothing to do with tomato paste). The icing called for a very unique frosting made of butter, sugar, egg yolks, chopped pecans or walnuts, raisins and bourbon or rum. While I planned to make this frosting all along, I hesitated to remember buying bourbon until Sunday. At that point, no matter how good my intentions, Georgia state law simply wouldn't allow me to make this frosting. So I opted for a more traditional ermine (boiled milk) frosting. Overall feedback was that this cake wasn't as moist as the 2007 cake, but still very tasty. This is not surprising considering the 2007 cake had 2 cups of oil, while this one only called for a 1/2 cup of shortening. Next time I'll probably increase it to a full cup of shortening, or replace it with a cup of vegetable oil. And while I do like the ermine frosting, I would opt for a nice cream cheese frosting (like the one in my first recipe) instead.


Red Velvet w/ Cream Cheese-Mascarpone Icing No. 3The Winner: Circa 2007 Cake (pictured bottom left)
The younger cake was adapted from The Confetti Cakes Cookbook by Elisa Strauss and published on February 14, 2007. The accompanying icing was adapted from The Waldorf-Astoria Cookbook. This recipe is for a three layer cake, but I forced it into two pans with 2" sides and used heating cores to compensate. The recipe creates a lot of batter, so I'd recommend making three layers, but a really thick two layer cake can be done. Overall I felt the cake had too much cocoa powder (1/2 cup), but several of the testers seemed to prefer it. If you're going for a more traditional red velvet, I think you could easily reduce the cocoa anywhere from 2 to 4 tablespoons.

See the detailed recipes below, along with a nifty bar chart that makes my study appear entirely more official.


1977 CAKE RECIPE:
The Cake:

1/2 cup white shortening (consider replacing with 1c veg oil)
1 1/2 cups sugar

2 egg
2 to 4 tablespoons cocoa
 (I used 2)
1/4 cup red food coloring (I used 2 fl oz instead)

1 teaspoon salt
1 c buttermilk
2 1/2 cups sifted flour
 (I used cake flour instead of APF and added 5T to compensate)
1 tablespoon vinegar
1 teaspoon baking soda

  1. Preheat the oven to 350 degrees.
  2. 
Cream together the shortening and sugar in the bowl of an electric mixer until fluffy. Add the eggs, one at a time, beating well after each addition. Beat one minute on medium speed.

  3. Blend the cooca and red food coloring (the amount of coloring may be reduced but the cake will not have its traditional vivid red color) and make a paste. Add this and the salt to the creamed mixture. Blend the vanilla and buttermilk. Alternately add this and the flour to the creamed mixture, beating constantly. Blend the vinegar and soda and beat this in.

  4. Meanwhile, butter and flour two nine-inch cake pans. Shake out the excess flour. Add the cake, batter to each pan and bake 25 to 30 minutes.

  5. Remove the cake layers and let cool on a rack. Turn out.
Ermine Frosting:
1 1/2 cups cold milk
7 tablespoons + 1 1/2 teaspoons sifted cake flour (measure after sifting)
2 1/2 sticks butter, softened
1 1/2 cups granulated sugar
1 1/2 teaspoons vanilla extract
  1. Mix milk and flour in a saucepan; simmer over medium heat until thickened, stirring constantly.
  2. Pour into a bowl. Chill until cool to the touch. 
  3. Cream butter, sugar, and vanilla until light and fluffy. 
  4. Add in chilled milk mixture, and beat until smooth and fluffy.

2007 CAKE RECIPE:
Red Velvet Cake:

1 tablespoon unsalted butter
3½ cups cake flour

½ cup unsweetened cocoa (I'd reduce this to 2-4T)
1½ teaspoons salt

2 cups canola oil

2¼ cups granulated sugar

3 large eggs

6 tablespoons (3 ounces) red food coloring
 (I used 2 ounces instead)

1½ teaspoons vanilla

1¼ cup buttermilk
2 teaspoons baking soda
2½ teaspoons white vinegar
  1. Preheat oven to 350 degrees. Place teaspoon of butter in each of 3 round 9-inch layer cake pans and place pans in oven for a few minutes until butter melts. Remove pans from oven, brush interior bottom and sides of each with butter and line bottoms with parchment.
  2. Whisk cake flour, cocoa and salt in a bowl.
  3. Place oil and sugar in bowl of an electric mixer and beat at medium speed until well-blended. Beat in eggs one at a time. With machine on low, very slowly add red food coloring. (Take care: it may splash.) Add vanilla. Add flour mixture alternately with buttermilk in two batches. Scrape down bowl and beat just long enough to combine.
  4. Place baking soda in a small dish, stir in vinegar and add to batter with machine running. Beat for 10 seconds.
  5. Divide batter among three 9" pans, place in oven and bake until a cake tester comes out clean, 40 to 45 minutes. Let cool in pans 20 minutes. Then remove from pans, flip layers over and peel off parchment. Cool completely before frosting.
Cream Cheese Icing w/ Mascarpone:
2 cups heavy cream, cold
12 ounces cream cheese, at room temperature
12 ounces mascarpone
½ teaspoon vanilla
1½ cups confectioners’ sugar, sifted
  1. Softly whip cream by hand, in electric mixer or in food processor. Cover in bowl and refrigerate.
  2. Blend cream cheese and mascarpone in food processor or electric mixer until smooth. Add vanilla, pulse briefly, and add confectioners’ sugar. Blend well.
  3. Transfer cream cheese mixture to bowl; fold in whipped cream. Refrigerate until needed.

Better with Age?

I simply couldn't decide on a single recipe for my next baking challenge, so instead I chose two.

Since many of the contemporary red velvet recipes differ by only a few ingredients, I thought it would be interesting to juxtapose it with an older, and hopefully more traditional recipe.

I went to the New York Times archives to do some digging, which by the way, is an amazing resource for baking cakes. Not only are their cake recipes some of the most popular, but you can search their archives back to 1851. You won't have any luck finding red velvet until the 20th century, but a good resource nonetheless.


For my first contender I chose a recipe that was published in the NYT on April 25, 1977. Earlier that same year, the NYT published a Q&A about red velvet cake that prompted a flood of responses from readers claiming to have the more authentic recipe. The recipe that was chosen and eventually published was from a woman named Carolyn A. Knutsen who claimed that hers was "an old Southern standard cake" that was passed down from her family in Alabama. Authentic? Perhaps not, but a solid first round pick.

For the opposition I settled on another NYT recipe, but this time published in 2007. I figured, what better competitor to the '77 recipe than one from the same authoritative source, published 30 years later?

And as such, the gauntlet has been thrown. I'll be baking both cakes this weekend and bringing them into my office on Monday to determine the winner. I'll follow up with the recipes, photos and results soon!

Cupcake Critique: Gigi's Cupcakes

Gigi's: Scarlett's Red Velvet 4Today at lunch I ran over to Gigi's Cupcakes for my first of many cupcake critiques around Atlanta. Gigi's is a chain, so right off the bat I had some preconceived notions. They have a wide variety of cupcakes from Italian Cream Wedding Cake, Peach Cobbler and Cherry Cordial, but I of course was interested in none other than Scarlett's Red Velvet.

The ECD (that's Executive Creative Director for the non-ad folks) at my agency @carlrwarner said to me that Gigi's has the perfect icing-to-cupcake ratio, but I respectfully must disagree. If there is enough icing on one cupcake to wallpaper a 10'x12' bedroom, that is too much. Surely from looking at the pictures it may seem I'm exaggerating, but keep in mind this cupcake suffered quite a bit of shrinkage on the ride home in this Atlanta heat.

In critiquing this cupcake I examined several key factors: appearance, flavor, texture and color.
So let's start with one of my favorite parts: the icing. The cream cheese icing was actually quite good, but perhaps too much of a good thing. The cake itself was less than desirable. The cake had far too much cocoa and actually tasted more like devil's food than anything else. Not only did it not taste like red velvet, but the cocoa also made the cake far too dark (ie violet oxide). The density was good, but perhaps because of the cocoa overload, tasted a little dry and lacked that velvety texture. I thought the vanilla custard filling would make up for it, but not so much. Admittedly I can be a snob when it comes to some of these things, but on a scale of 1 to 10, I give Gigi's a 4. I am sure some of their other cupcakes are fabulous, but their red velvet just doesn't cut it.

Gigi's: Scarlett's Red Velvet 2
Gigi's: Scarlett's Red Velvet 1

A Quest for Perfection

This is my first documented attempt along a journey to create the perfect recipe for red velvet cake. I'm starting with what I know, but plan to venture way back to explore the history of this elusive cake including its boiled icing and beetroot ancestors.

My first recipe has been adapted from Paula Dean's, but I've modified the flour, cocoa and icing, as well as tweaked some of the directions. I received a lot of good feedback from my test subjects (ie work colleagues), and especially on the icing. The cake itself had a nice scarlet color and a good velvety texture, but was still light - a perfect complement to the sweetness of the icing. I find that these cupcakes are usually more moist the following day, so I'd bake them ahead of time and then ice them before you are ready to serve. Try it out and let me know what you think.


For the red velvet cupcakes:

2 1/2 c + 5T cake flour (sift before measuring)
1 1/2 c sugar
1t baking soda
1t salt
1T + 1t natural cocoa powder (not dutch-processed)
1 1/2 c vegetable oil
1 c buttermilk - the fattening kind (room temperature)
2 large eggs (room temperature)
2T red food coloring
1t white distilled vinegar
1t pure madagascar vanilla

For the cream cheese icing:
1lb box of confectioners sugar (a little under 4 1/2 c sifted)
1-8oz block of cream cheese - the fattening kind (softened)
1 stick unsalted butter (softened)
1t pure madagascar vanilla

Directions:
Preheat the oven to 350. In a medium bowl, sift together the flour (pre-measured and sifted), sugar, baking soda and salt. In a small bowl or ramekin, mix together the cocoa and food coloring to form a paste. In a large bowl, gently beat (speed 1 or 2 of a handheld mixer) the oil, buttermilk, eggs, vinegar, vanilla and red paste mixture until blended. Add in the dry ingredients slowly and beat (speed of 1 or 2) until smooth. Divide the batter evenly among lined cupcake tins (I use roughly less than 1/4 c in each).

Bake at 350 for 20 minutes, turning once half way through. Cool in tins for no more than 10 minutes, then transfer to a wire rack to cool completely (about 40 minutes).

In a large bowl beat the cream cheese, butter and vanilla until smooth. Slowly sift in the confectioners sugar and beat on a low speed until incorporated. Then increase the speed until fully blended. Piping cream cheese icing isn't the easiest, so I'd recommend frosting the cupcakes with a spatuala or butter knife.

Happy Baking!