Several weeks back I did a post on the JWT Atlanta blog called
The Next Big Thing Could Actually be, Quite Small and asserted my prediction that cake balls were going to be all the rage. Well today I am here to tell you
that they are.

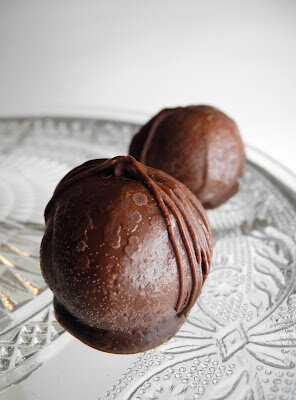
I was at first a skeptic, but after making some red velvet cake balls from scratch I was truly convinced. There is something so heavenly about homemade red velvet cake and cream cheese icing mixed together, blanked by a nice, rich coating of chocolate.
I'm not going to lie, these little beauties are pretty labor intensive if you make them from scratch. As a matter of fact, you may start to hate me half way through this process and wonder why you ever decided to make these. But this is when you must press on. I assure you that all of your frustration will be worth its weight in gold once you bite into one of these.
Should you choose to make these, here are a few pointers I'd like to offer:
- Find a Kroger and buy a package of their white or dark chocolate bark. You can also use candy melts, but I found them much more difficult to work with.
- Invest in a candy dipping fork or set
like this one
. Spend a few more dollars on the metal dipping fork, as I rendered my plastic set useless trying to make these.
- You can use any red velvet cake and frosting recipe, but the following is one of my own. If you use another recipe you will need a 9x13 cake, about 2 cups of frosting and 1 or 2 packages of chocolate bark (depending on how much of a perfectionist you are).
For the red velvet cake:
2 1/2 c + 5T cake flour, sift before measuring
1 1/2 c sugar
1t baking soda
1t salt
1T + 1t natural cocoa powder, not dutch-processed
1 1/2 c vegetable oil
1 c buttermilk, room temperature
2 large eggs, room temperature
2T red food coloring
1t white distilled vinegar
1t pure madagascar vanilla
For the cream cheese icing:
2 1/4 c confectioners sugar sifted
4oz (1/2 a block) of cream cheese, softened
1/4 c mascarpone cheese
4T unsalted butter, softened
1/2t pure madagascar vanilla
For the candy coating:
1 or 2 packages of white, milk or dark chocolate bark (while I liked the way the white chocolate looked, the milk/dark chocolate tasted much better). I recommend getting two packages since the chocolate tends to get messy after a while with crumbs from the cake balls.
Directions:
Preheat the oven to 350. In a medium bowl, sift together the flour (pre-measured and sifted), sugar, cocoa, baking soda and salt. In a large bowl, gently beat (speed 1 or 2 of a handheld mixer) the oil, buttermilk, eggs, vinegar, vanilla and red food coloring until blended. Add in the dry ingredients slowly and beat (speed of 1 or 2) until smooth. Pour into a lined and greased 9x13 pan.
Bake at 350 for approximately 30 minutes, turning once half way through. Cool in pan for no more than 10 minutes, then transfer to a wire rack to cool completely. Once your cake has cooled, shave off any hard edges of the cake using a serrated knife.
In a large bowl beat the cream cheese, mascarpone, butter and vanilla until smooth. Slowly sift in the confectioners sugar and beat on a low speed until incorporated. Increase the speed until fully blended. Now here's the fun part. Take your cake and crumble it into a large mixing bowl. Add up to two cups of the cream cheese icing and mix with a spatula (or with your hands if you don't mind getting a little messy) until fully incorporated. It will be the consistency of a thick dough. Roll the mixture into balls and lay onto a cookie sheet. Place in the freezer until ready to coat in chocolate.
Before coating the cake balls must chilled, but not completely frozen. Melt the chocolate bark in microwave according to directions on package. Dip and cover one cake ball at a time using either a spoon or a dipping fork and place on a parchment lined cookie sheet. I like to take one or two cake balls out of the freezer at a time, as they are easier to work with that way. You can cover up any mishaps with a second coating (or drizzle) of chocolate once the first layer has hardened.
Good luck and let me know how it goes!
 I'm getting ready to leave for Cambodia in two weeks and promised some friends I would make them some more red velvet cake truffles before I left.